
So, a little bit about me….I am a wife and mommy to two sweet little boys and one very outspoken little girl…all 4 years and under. I plan on homeschooling, but since they aren’t of school age yet, I spend a lot of time sewing and crafting…mostly sewing, and they spend a lot of time, ehem, “helping”. Which basically means they pulled the thread out of my sewing maching when I wasn’t looking or like the time I left my scissors out by accident and Sophie cut up part of a dress I was working on…seriously, I was out of the room for two minutes! How do they get into these things so quickly?!?
My husband travels a lot for work. Which means, it’s typically just me and three young kids….so I love blogging since it’s sometimes the only adult interaction I have for days at a time! But I also love being inspired by all of you out there!
So, what I want to share with you guys is super quick and easy…
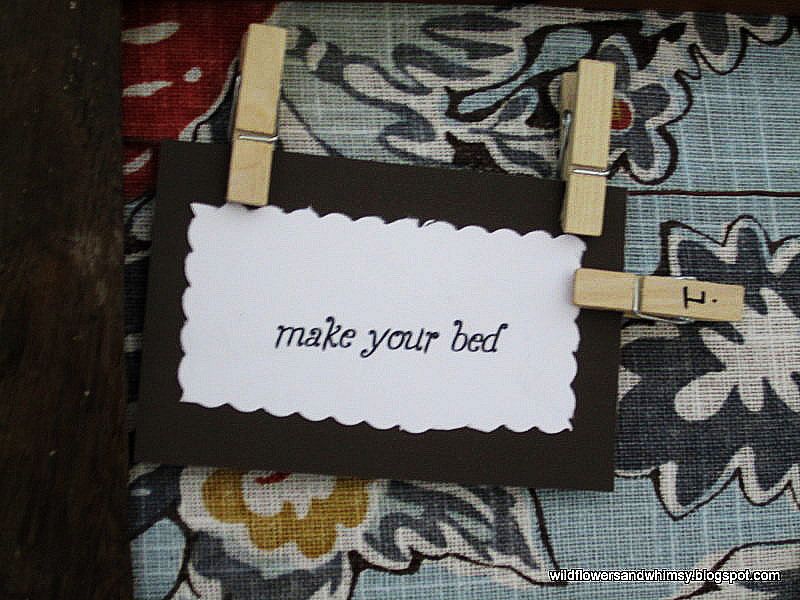
it’s a decor friendly chore chart.
A couple years ago when I first started potty training someone gave me a magnetic chart for my kids…everytime they dowhat they were supposed to, they get to chose this little magnet sticker thing-a-ma-jig and put it on the chart. They were nuts for it! They still ask at least once a day to chose a sticker for using the potty, so I thought it would be a good way to encourage them to do their chores each day.
Originally, I was going to make one out of felt, but I since I am finally decorating my house, after 2.5 years here, I just didn’t want to put something kiddie on the wall after all the time and effort I am putting into decorating. So
after many, many failed experiments, I finally came up with this:
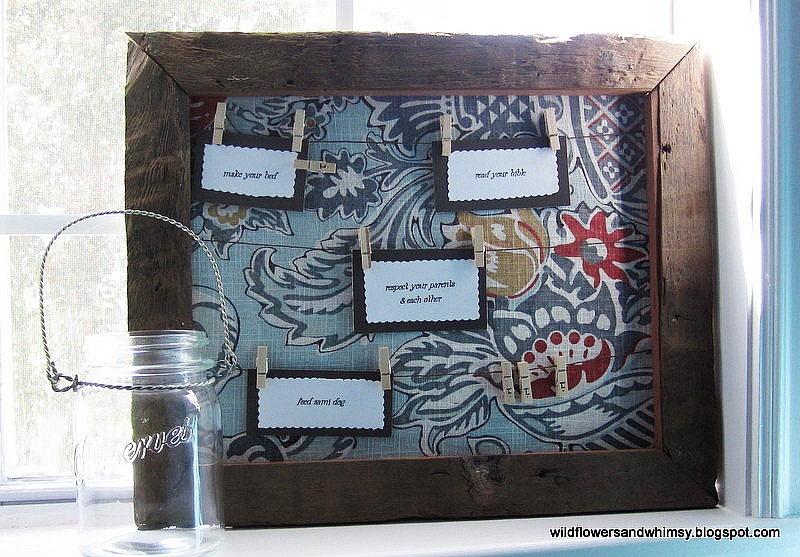
There are actually more cards than this, but because of all my mishaps with the others, I only had enough clothes pins left to hang up four…
What you’ll need:
Picture Frame (11″ x 14″ or bigger)
Fabric
Twine, cording, or string
Cardstock
Scrapbook paper
Mini Clothes Pin Paper Clips (found mine at Wal-Mart in the office supplies)
Glue Stick
Glue Gun & Glue Sticks

Take the cardboard out of your picture frame…mine didn’t have one since it was made by my grandfather so I just used a box cutter to cut some cardboard I had lying around down to size. If you do this, you’ll want to measure the opening were the card board goes. Chances are the little lip you set the glass/picture in is about 1/4″ so if you are working with say an 11″ x 14″ you’ll need to add that to the size of your cardboard…I had to cut mine 11.5″ x 14.5″. Then, cut your fabric out so that it is about 1″ bigger than your cardboard all the way around. Then, just hot glue it all the way around the back, folding the corners like you would when wrapping a present.

Type out your chores/responsibilities along with your kids names and
s-m-t-w-t-f-s just below it…I recommend at least four spaces between each of the days and print them onto your card stock and cut them out. I used some decorative scissors I had to make them a little cuter.
I wanted mine all to be roughly 3″ x 2″, but I basically just eyeballed it, and went with the size that looked good for what was on each card. Next, I cut my scrapbook paper (I think this was actually textured cardstock, but whatever you like or have on hand will work just fine) into 3″ strips, and used a glue stick to glue my chore cards on.
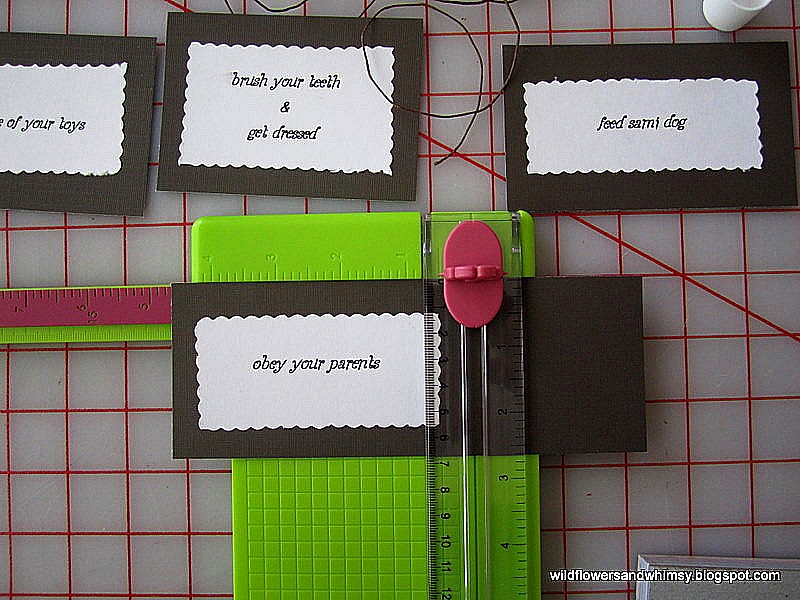
I glued them one at a time, and again, I just eyeballed it. I ended up putting about 1/4″ border around each chore card.

Next, I cut three pieces of cording several inches longer than my cardboard, laid out my chore cards. Then, I ran a piece a cording across the top of each row, and used a disappering fabric marker to mark the spots where I wanted my cording to be attached.

Tie a fat knot in the end of each piece of cording…I swooped the end around three times before pulling it tight.

I am hoping this will keep the cording from slipping out of the hot glue. Cut 6 scraps of fabric about 1″ x 1″.

Turn your cardboard over and lay the knot down on the back of the cardboard. Put some hot glue on top of the knot and press a fabric square over it. *I highly recommend using a low temp glue gun* And obviously be very careful not to burn yourself.

Wrap each piece of cording tightly across the front and tie a knot at the other end, and glue to the back on the opposite side of the cardboard the same way you did on the first side.

Here’s what it should look like and you can just trim the ends once the glue is completely cooled…I cut the cording really long to make it easier to tie the knot on the other side.

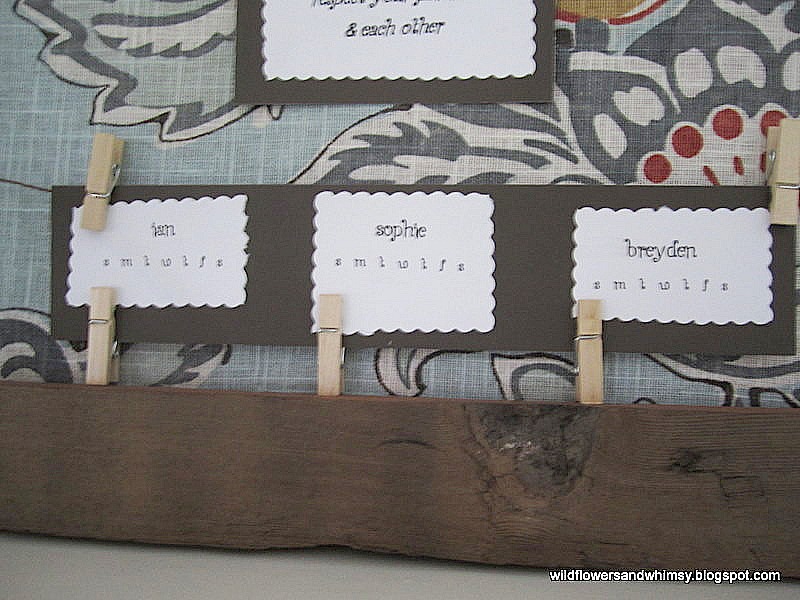
Pop the cardboard in your frame and clothes pin your chore cards to the cording.

Next, I put each child’s initial on the other clothes pins…one for each chore card per child, and hang one clothes pin with each child’s inital next to each chore card.

Each day, after completing each chore move their clothepin onto the chore card.
Then, at the end of the day if all their chores/responsibilities where completed I put a clothes pin on that day. My kids get allowance each week…$1/year old they are, so I just divide that amount by seven and if one of the days doesn’t have a clothespin on it at the end of the week, I subtract that much from their allowance. That’s it! Hope you liked it!
If you stop by my blog, make sure to let me know so I can check yours out too!
Thanks Jenn for letting me share my tutorial!

Thanks April!!
What a wonderful chore chart.
I love how stylish and pretty it is too!

April has a wonderful blog.
Some of my favorite projects she has done are:


Be sure to head over to Wildflowers & Whimsy and give April a warm hello!
xoxo
PS — I found out about a fun party:

Rachel from Family Ever After is hosting a “Self Portraits in my Kitchen” idea. Where you take a picture of you, doing something in your kitchen. And you can link your creative post up to Rachel’s party. So fun!!
PPS — It is FRIDAY!! My favorite day of the week. Why?? Because I get to see what YOU have been working on!! Come link up YOUR great ideas TONIGHT at 6 PM {mst} at the Weekend Wrap Up Party!!

This post sponsored by


